Our Articles

Initial Exchange Offering(IEO) Explained

After the craze of ICOs subsided, two new crypto crowdfunding methods emerged, namely the Security Token Offering (STO) and the Initial Exchange Offering (IEO). Among the two, IEO is more popular as STO poses a higher barrier of entry, is more expensive, and is subjected to more stringent regulations by the securities commission.

In a recent article, Reuters reported that IEOs have raised $1.5 billion so far in 2019, compared with just $836 million raised from ICOs. A dozen of amazingly successful cases of IEOs have driven more project owners to embark on their own IEO journeys. Famous IEO cases include the sale of the BitT Torrent (BTT) token on the Binance Launchpad, raising $7 million in just the first 14 minutes of the sale opening. Veriblock did even better, raising $7 million in April through an IEO on the Bittrex exchange in just 10 seconds. A truly amazing feat! It is safe to say that IEO has taken over ICO as the preferred choice of fundraising in the cryptocurrency industry.

What is IEO?

According to Binance, an Initial Exchange Offering (IEO) is a fundraising campaign that is administered by a Crypto Exchange Platform.  An IEO allows investors to purchase a new cryptocurrency (or token) while raising funds for its crypto project. 

Though ICOs and IEOs both raise funds through token sales, the way they sell tokens is different. For ICOs, the project team themselves conduct the fundraising campaign. Meanwhile, IEO fundraising is conducted on a crypto Exchange platform, where the users of the Exchange can buy tokens with funds directly from their own exchange wallet. 

Advantages and disadvantages of IEO

Advantages

INCREASED INVESTOR CONFIDENCE

Investors are more confident in investing in IEO tokens as the project has to undergo stringent KYC/AML checks by the Exchange platform that handles the IEO projects. The Exchange platform will also evaluate the business model of the project and also audit its technical infrastructure, including its blockchain system and smart contracts. Therefore, many scam projects will be filtered and eliminated. The Exchange platform acts as a trusted third party that can reduce considerable risk in crypto investment.

WIN-WIN FOR THE PROJECT OWNER AND THE EXCHANGE

For the project owner, it is a cheaper and easier way to raise the necessary funds for the project, while not embarking on long marketing campaigns and roadshows. The token is also listed on the Exchange immediately after the IEO campaign.

For the Exchange, conducting an IEO means more revenue for them. An Exchange that hosts an IEO will typically charge a fee for the campaign and get a cut from the token sales. They also get fees when the token starts trading on their exchange.

Disadvantages of IEO

AMBIGUOUS REGULATIONS AND RESTRICTIONS

Many countries still ban or restrict fundraising activity in the cryptocurrency industry while some countries impose stringent regulations on crypto activities. Therefore, it is still uncertain whether IEO will be fully accepted and recognised as the legal way of fundraising in the crypto industry.

ALL INVESTORS SUBJECTED TO STRINGENT AML/KYC

While a stringent KYC/AML check for the project can increase investor confidence, some individuals may be reluctant to expose their identities, so going through a stringent AML/KYC procedure may deter these people from investing in the IEO project.

LIMITED NUMBER OF TOKENS

There have been many complaints from investors that not everyone manages to purchase tokens during IEOs as the number of tokens available for sale is usually limited.

BOTTING CONCERNS

Using bots for trading and investing is ubiquitous nowadays. In the crypto space, there are concerns about bots that can be programmed to participate in IEOs and beat out human investors. In such a scenario, all parties lose out.

How to Conduct an IEO?

Although an IEO is a promising method for fundraising, especially for startups that don’t have the resources and expertise to do an IPO, it is by no means an easy feat. The project owner needs to plan and make the necessary preparations before embarking on the IEO initiative. The following are suggested steps that a project has to follow before going IEO.

DESIGN THE BUSINESS MODEL

Before embarking on an IEO campaign, the founding members of the project must have a clear vision of what their business wants to achieve. They also have to design a business model and draw up plans to attain the vision.

ASSEMBLE A FORMIDABLE TEAM

In this internet era where information is readily available, potential investors and Exchanges will know instantly the background of the project team members. If the project team comprises mostly inexperienced people, it will seriously affect the confidence of the investors and the Exchanges. Therefore, the project owner needs to assemble a formidable team that comprises experts in business, legal, technology, marketing, and other related disciplines. As most IEO projects are blockchain-based, it is a must to hire blockchain experts.

PREPARING THE WHITEPAPER AND OTHER DOCUMENTS

The whitepaper is a document that comprises a thorough description of the project, distribution of tokens, business model, tokenomics and more. It also includes information about the project team which usually comprises the board members, the marketing team, the technical team, the legal team, and the advisers.

Writing the whitepaper is a very important step in the IEO campaign. It is an important document that showcases the project. Whether the investors will be impressed and looking forward to investing in the project depends on how well the paper is written.

Besides the whitepaper, the project team should also prepare a one-pager, website, pitch decks, social media pages and more. These are the components that contain the primary source of knowledge about the project for potential investors and Exchanges to evaluate the IEO project.

DEVELOP THE TOKEN

The token is an integral part of the IEO project. Without a native token, what can you sell to the investors? Therefore, it is crucial to design the token from day 1, and start developing it as soon as possible.

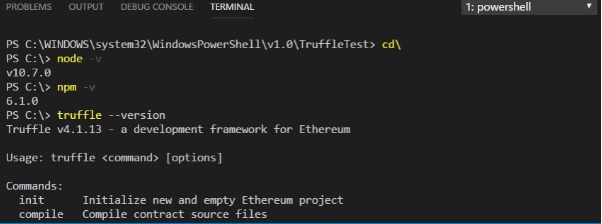
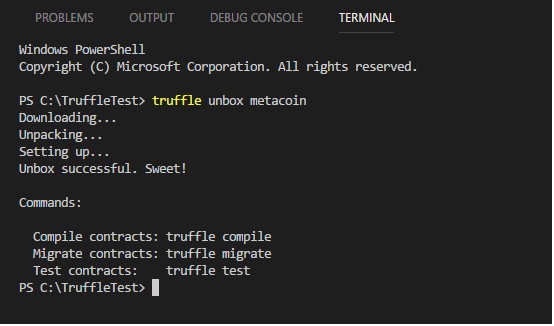
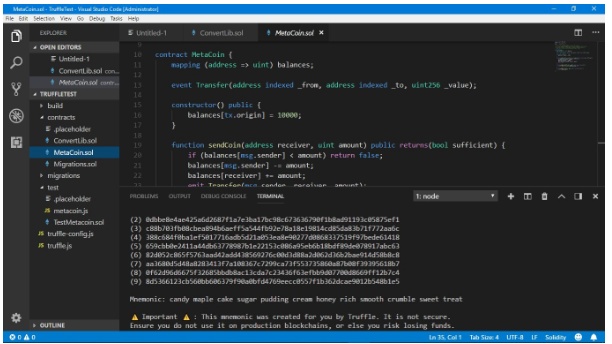
Most tokens for IEO projects are ERC20 tokens. The ERC20 standard is chosen because it can be easily designed and deployed to the Ethereum main net. However, if you want a customized token and your team has the expertise and programming skill, you can develop a different protocol from the Ethereum main net, or even develop your own blockchain system.

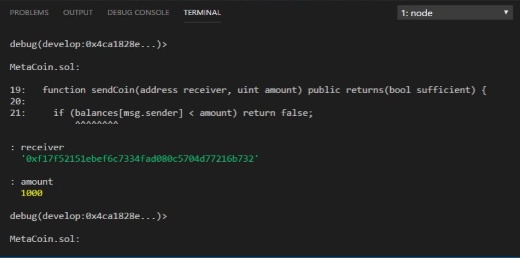
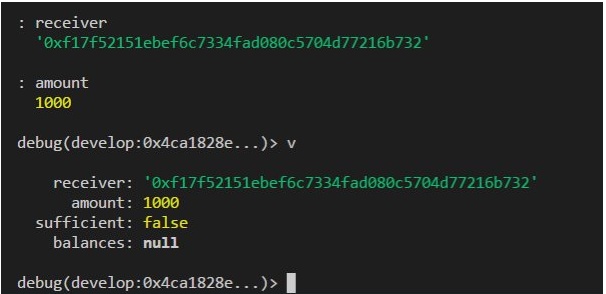
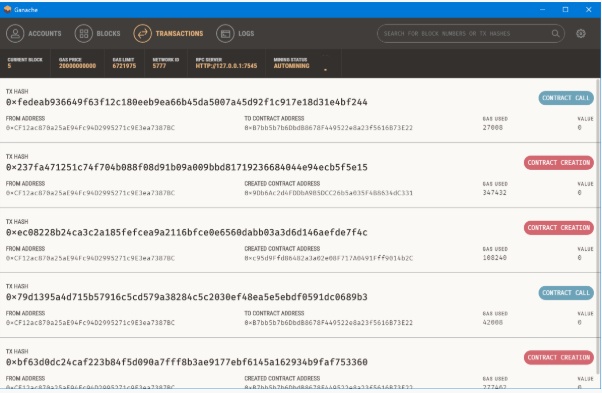
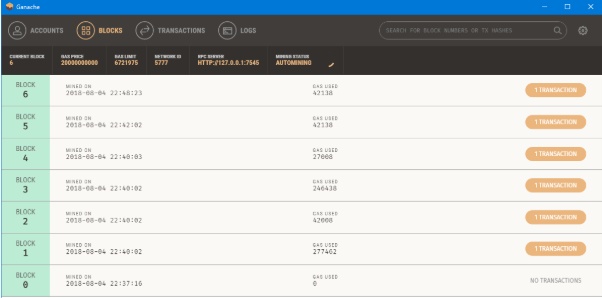
To mint the ERC20 token, the blockchain developers need to write a robust smart contract and have it tested and also audited by a trusted third party contract auditor to ensure the contract is secure and free of bugs. The audited token can then be deployed to the Ethereum main net or a private network.

MARKETING

The project team needs to carry out an aggressive marketing campaign for its IEO initiative in order to broadcast the news to as many investors as possible. The marketing campaign can be conducted through websites, blogs, as well as social media platforms such as Facebook, Twitter, WhatsApp, WeChat and more. They can also organise events and conferences to promote their token but they need to check whether these activities can be conducted in certain countries. For example, you cannot do so in Malaysia and China.

ENGAGE A CRYPTO EXCHANGE

The project team also needs to sign an agreement with a crypto Exchange to start their IEO campaign. They need to conduct due diligence in searching for a trusted Exchange before deciding to engage one. A good guide is to look for Exchanges that rank within the top 50 on Coinmarketcap. Besides, they need to analyze reviews of the Exchanges on various crypto platforms. IEO fees may also be another concern, as a top rank Exchange may charge an extremely high fee. Therefore, there is always a trade-off between the fee and the reputation of the Exchange.

Final Note

IEO has replaced ICO as the new trend in fundraising in the crypto industry. Investors who are still thinking of the good old days of ICO should start changing their mindset and focus on investing in IEO projects instead. On the other hand, startups or enterprises who wish to raise funds in the crypto industry must realize that ICO is already dead and IEO is the way to go. Lastly, more exchanges should create IEO launchpads to assist projects that wish to raise funds through IEO, as this is an untapped niche with immense potential. 

References

Building Blockchain for Business

Blockchain is the underlying technology for Bitcoin, Ethereum, and other cryptocurrencies. However, cryptocurrency is far from the only application of blockchain for businesses. One of the most popular business applications of blockchain is fundraising, especially for startups. Apart from conventional ways of funding, blockchain enables alternative methods of fundraising such as ICO or STO.

In the past few years, many companies have raised an incredible amount of money via ICO. Some of the biggest and most successful ICO projects include NEO, Ethereum, Spectrecoin, and Lisk. More info about ICO can be found on the Investopedia website.

That said, I am not going to discuss ICO in this article. Instead, we shall explore blockchain applications in businesses. Though we can use blockchain for all kinds of business applications, whether or not blockchain is suitable for a particular business depends on the nature of the business, the business model, the requirements, and many other factors.

Before implementing blockchain, the C-level management team of a business organization should conduct a feasibility study to determine whether it is necessary and plausible to adopt blockchain technology. You should ask the following questions:

  • Can blockchain add value to the current business?
  • Can blockchain increase the organization’s competitiveness?
  • Do you need to deal with many trustless parties?
  • Do you need a decentralized and distributed database system?
  • Can blockchain improve workflow efficiency?
  • Can blockchain increase revenue and profit?
  • Do you have enough financial resources to implement blockchain?
  • Can blockchain technology integrate with existing systems?
  • Do you have enough talents to manage the blockchain system?

Once you’ve decided that implementing blockchain would benefit your company, you need to carry out the following steps:

  1. Identify a suitable use case.
  2. Assemble your team.
  3. Design the blockchain architecture.

Identify a suitable use case

To embark on a blockchain project, you need to identify the most suitable use case for your business. The best way is to examine use cases in an industry that is similar to your business. Generally, there are three areas in which blockchains can perform very well.

Data Authentication & Verification

This includes immutable storage, digital signatures, and encryption. Data in almost any format can be stored in the blockchain. Blockchains can create public-private key pairs and also be used for generating and verifying digital signatures. Therefore, it can be used for data authentication & verification.

One of the best usages is counterfeiting prevention. For example, Luxtag, a Malaysia-based blockchain company, has patented an anti-counterfeit technology. This technology enables businesses and their customers to protect the authenticity and ownership of their valuable assets by providing digitized certificates using blockchain technology. They have rolled out their first product, known as e-Scroll, for a consortium of Malaysian public universities to verify and validate certificates using a blockchain-powered web application.

Another area related to authentication and verification is data provenance. One of the most successful companies in this area is Everledger. This company has built the Diamond Time-Lapse Protocol, a traceability initiative built on a blockchain-based platform for the diamond and jewelry industry. The system is to ensure that there is transparency along the entire diamond’s lifetime journey, instilling consumer confidence and driving industry growth.

Another application is supply chain management. The most notable is the initiative by Walmart using blockchain technology to ensure food safety. Walmart has been working with IBM on a food safety blockchain solution requiring all suppliers of leafy green vegetables for Sam’s and Walmart to upload their data to the blockchain by September 2019. By placing a supply chain on the blockchain, it makes the process more traceable, transparent and fully digital.

Watch the following video about food safety:

Other business applications could be medical records management, insurance, KYC management for banks, and more.

Digital Asset Management

Any asset that can be digitized is considered a digital asset. Digital assets include ebooks, digital art, images, video, music, journals, newspapers, audio books, online training courses, recipes, and more. With the invention of blockchain technology, digital assets also include crypto assets. Crypto assets can be cryptocurrencies like Bitcoin, Ethereum, and other altcoins, or the tokenized version of a real-world asset such as gold, silver, oil, land titles, property, paintings, etc.

Currently, most digital assets are traded over the Internet via the centralized e-commerce marketplace. However, digital assets can be traded more efficiently over the decentralized peer-to-peer blockchain platforms.

Some real world use cases for digital assets management in blockchain include:

  • AlphaPoint. Provides enterprise-grade software that enables institutions to convert assets to securities tokens and trade those assets on an exchange.
  • Polymath. Enables trillions of dollars of securities to migrate to the blockchain.
  • Harbor. Offers a digital securities platform for compliant fundraising, investor management, and liquidity.
  • Powerledger. Provides a platform for peer-to-peer energy trading.

Smart Contracts

A smart contract is a programmable contract that enables auto execution of a contract the moment it fulfills certain terms and conditions. It is akin to a vending machine – you get your product by inserting some coins or banknotes.

According to Investopedia, smart contracts are:

“self-executing contracts with the terms of the agreement between buyer and seller being directly written into lines of code. The code and the agreements contained therein exist across a distributed, decentralized blockchain network. Smart contracts permit trusted transactions and agreements to be carried out among disparate, anonymous parties without the need for a central authority, legal system, or external enforcement mechanism. They render transactions traceable, transparent, and irreversible.”

Almost any blockchain business application involves the use of a smart contract. A famous use case is Cryptokitties. A smart contract is executed when a user acquires a unique virtual kitty from the Cryptokitties collectible marketplace via a bidding process. The highest bidder gets to own the digital asset. Other dapp transactions also make use of smart contracts.

Blockchain-powered supply chain management makes use of smart contracts to handle transactions between manufacturer, suppliers, wholesalers, and retailers.

In the insurance industry, the client who wishes to buy insurance can provide personal information including sensitive data like medical records via a smart contract to the insurance company. In the health care industry, a patient can get faster and more accurate diagnoses and treatment via a smart contract that allows them to share medical records.

Assemble your Team

After conceptualizing a business use case that is suitable for your business, you need to assemble your team to kick-start the blockchain project. Getting the right people in your team is crucial to success. Your team should comprise people with business skills and also people with technical skills. People with business skills should be able to see the overall picture of your business model and know how to execute it. They must also have good interpersonal skills, strategic thinking, good networks, and financial knowledge. The people with business skills should be assigned the posts of CEO, CFO, marketing manager, business development manager, and so on.

People with good IT skill in general and blockchain in particular are equally important. The CTO must have many years of experience in the IT and software industry and have a good grasp of blockchain. He or she must be assisted by a technical lead who has good practical experience in setting up the blockchain platform, know how to program the smart contract, sound knowledge of programming languages including Solidity, JavaScript, Goland, C++, Java, Python, and so on.

In addition, if you plan to raise funds via ICO, you need to employ a compliance officer, preferably a lawyer who understands the guidelines provided by the security commission and the central bank.

Designing the Blockchain Architecture

You need to decide whether to build the blockchain network from scratch, or use a third party blockchain solution like Azure blockchain, Oracle, or AWS blockchain. The former is time-consuming, whereas the latter could be up in as little as 30 minutes.

Each of the the aforementioned enterprise blockchains offer their own functionalities and features as well as cost advantages. Both AWS and Azure offers solutions for Ethereum, Hyperledger Fabric, Corda, and Quorum, while Oracle only caters for Hyperledger Fabric. We can compare their features in the following table:

Courtesy of 101 Blockchains


The cost of setting up Azure Blockchain Workbench is roughly $400-$500 depending on your region and usage. The main costs are three VMs and one app service. Two VMs are for the default blockchain network, and one VM is for the microservices on Workbench. For AWS Blockchain pricing, refer to: https://aws.amazon.com/managed-blockchain/pricing/

References

Developing an Ethereum Cryptocurrency on Windows

You can develop your very own cryptocurrency using your laptop that runs Windows operating system. This article a step by step guide for newbies to easily developing and deploying a token using the sample code provided by the Truffle framework. Truflle is a world-class development environment, testing framework and asset pipeline for blockchains using the Ethereum Virtual Machine (EVM).

This is a step-by-step guide for developing an Ethereum-based cryptocurrency on Windows.

To start the project, we need to set up a development environment with the following requirements:

  • A code editor
  • Source control
  • Unit tests
  • Debugging

For code editor, we use Visual Studio code for the following reasons:

  1. VS Code integrates very well with Git for source control. Git is currently the best choice for source control.
  2. VS Code works well with Truffle framework that manages unit tests.
  3. VS Code works well with Truffle for debugging

Besides that, Visual Studio code is a great tool for editing Solidity smart contracts and is available on Windows, Mac & Linux.

I. Installation of  the Packages

Step1: Install Chocolatey

Launch PowerShell as administrator. In PowerShell, enter the following command:

 
Set-ExecutionPolicy Bypass

*The Set-ExecutionPolicy changes the user preference for the Windows PowerShell execution policy.*Bypass-Nothing is blocked and there are no warnings or prompts. This execution policy is designed for configurations in which a Windows PowerShell script is built in to a a larger application or for configurations in which Windows PowerShell is the foundation for a program that has its own security model.
* Why Chocolatey-“You’ve never deployed software faster than you will with Chocolatey.” -Rob Reynolds. Chocolatey is a software management automation.

Install Chocolatey by entering the following code:

iex ((New-Object System.Net.WebClient).DownloadString('https://chocolatey.org/install.ps1'))

*https://chocolatey.org/docs/installation
*iex-invoke expression-The Invoke-Expression cmdlet evaluates or runs a specified string as a command and returns the results of the expression or command. Without Invoke-Expression, a string submitted at the command line would be returned (echoed) unchanged.

*A cmdlet (pronounced “command-let”) is a lightweight Windows PowerShell script that performs a single function.

* https://chocolatey.org/install.ps1 downloads the Chocolatey installation zip file, unzips it and continues the installation by running a scripts in the tools section of the package.

After installation completed, close and reopen PowerShell as administrator again.

Step 2 Install Visual Studio Code, Git and Node.js

Enter the following code in PowerShell:

choco install visualstudiocode -y 
choco install git -y  
choco install nodejs -y 

*Git (/ɡɪt/[7]) is a version control system for tracking changes in computer files and coordinating work on those files among multiple people. It is primarily used for source code management in software development,[8] but it can be used to keep track of changes in any set of files. As a distributed revision control system, it is aimed at speed, data integrity] and support for distributed, non-linear workflows.

*Node.js is a JavaScript runtime built on Chrome’s V8 JavaScript engine.

*As an asynchronous event driven JavaScript runtime, Node is designed to build scalable network applications. In programming, asynchronous events are those occurring independently of the main program flow. Asynchronous actions are actions executed in a non-blocking scheme, allowing the main program flow to continue processing

Close and reopen PowerShell before proceeding to the next step

Step 3 Install Truffle Framework

Truffle is a world class development environment, testing framework and asset pipeline for Ethereum, aiming to make life as an Ethereum developer easier

(https://truffleframework.com/docs). We use npm (Node Package Manager) to install Truffle Framework. Enter the following code:

npm install -g truffle

You can check the version of installed packages with the following code:

node -v 
npm -v  
truffle --version 

The output is as shown in Figure 1.

Figure 1

II. Configuring VS Code for Ethereum Blockchain Development

Step 1 Choose the folder for your project

Choose a folder you prefer for your project and enter the following code:

mkdir TruffleTest; cd TruffleTest; code .

The final command in the chain is “Code .”, which opens an instance of Visual Studio Code in the folder from which the command is executed.

Step 2  Install Solidity in the VS Code IDE

In the VS Code IDE, search for Solidity and install it

Step 3  Install  Material Icon Theme

In the VS Code , install Material Icon Theme

Now you have the VS integrated with PowerShell IDE for Ethereum Blockchain development.

III. Creating a Blockchain Application

We will create a sample cryptocurrency and a smart contract using the built-in sample MetaCoin in Truffle. Now, download the  files that can be compiled and deployed to a simulated blockchain using Truffle.

The code is

truffle unbox metacoin

The output should looks as shown in Figure 2.

Figure 2

After downloading Truffle metacoin, we should be able to view two important application files written in Solidity, MetaCoin.sol and ConvertLib.sol, in Figure 3.

* Solidity is a contract-oriented, high-level language for implementing smart contracts. It was influenced by C++, Python and JavaScript and is designed to target the Ethereum Virtual Machine (EVM).

*the Ethereum Virtual Machine is designed to serve as a runtime environment for smart contracts based on Ethereum.

Figure 3

These two files can be compiled and deployed to a simulated blockchain using Truffle.

To compile the smart contract, using the following command

truffle compile

*Or use truffle.cmd compile if there is error as shown in Figure 4.

Figure 4

*Source: https://ethereum.stackexchange.com/questions/21017/truffle-microsoft-jscript-runtime-error

After compilation completed, You will notice that a ‘build’ folder has been added to the list of files, which contains the compiled json files ConvertLib.json, MetaCoin.json, and Migrations.json, as shown in Figure 5.

Figure 5

IV Deploying the Contract

To deploy the contract, we shall migrate the contract  to a test network in truffle development environment.

The ‘develop’ command appears in  the Truffle development console environment. This will set up a kind of dummy blockchain, that operates similarly to the real Ethereum blockchain, and allows us to test deployment and execution of the code without needing to interface with an actual blockchain.

To compile the contract, key in the following command

truffle develop

This command will launch the truffle development environment, automatically configured with 10 accounts and keys. The output is as shown in Figure 6.

Figure 6

To deploy the compiled contract to the Truffle environment, enter the following command:

migrate

This will deploy the contracts to the test environment. The output is as shown in Figure 7.

Figure 7

To test the contract, enter the following command

test

You will see the output as shown in Figure 8.

Figure 8

To exit the Truffle console, type ctrl+D

To reenter the Truffle console, enter the following code

truffle develop 
migrate --reset  
test 

V Interacting with the contract with Web3

We have deployed and test the contract, now let’s do something with the contract. We will need to use the Web3 framework to interact with the smart contract on the Ethereum blockchain. Web3 is a JavaScript library which is bundled into the Truffle development console.

When the Truffle development console is started, it automatically configures 10 addresses, and assigns each of the addresses 100  Eth. You can check the ten available addresses by entering the following code:

web3.eth.accounts

The output is as shown in Figure 9.

Figure 9

You can display individual account using the following syntax

web3.eth.accounts[n]

For example, enter the following code to see the output

web3.eth.accounts[2]

The output is as shown in Figure 10.

Figure 10

Functions in the MetaCoin.sol file

There are four functions in the MetaCoin.sol file, as follows:

  • MetaCoin, the constructor. It is called when the contract is deployed.
  • sendCoin, for transferring coins between addresses.
  • getBalanceInEth, to convert between MetaCoins, and Ethereum.
  • getBalance, to show the balance in the requested address.

*  A constructor is a special method of a class or structure in object-oriented programming that initializes an object of that type. A constructor is an instance method that usually has the same name as the class, and can be used to set the values of the members of an object, either to default or to user-defined values.

The constructor MetaCoin comprises only one line

balances[tx.origin] = 10000;

*You can change this to any amount

This code initialises  the transaction to 10000 MetaCoin(Not Eth)

The initial address is

Web3.eth.accounts[0]

Checking Balance using the getBalance() method

You can check the balance of any account using the following code

web3.eth.getBalance(web3.eth.accounts[n]).toNumber()

Will display the balance in wei. To convert it to ether, you need to divide it by 10^18

You can use

web3.eth.getBalance(web3.eth.accounts[n]).toNumber()/1000000000000000000

Or

web3.fromWei(web3.eth.getBalance(web3.eth.accounts[n]),'ether').toNumber();

For example, to check the balance of account 0, enter the following code

web3.eth.getBalance(web3.eth.accounts[0]).toNumber() 

**The cryptocurrency generated by the getBalance function  is Wei

1 Ether =  1,000,000,000,000,000,000 Wei (1018) or 1 Wei=10^-18 Ether

The output is as shown in Figure 11.

Figure 11

To check the balance in Ether for account 0, enter the following command:

web3.fromWei(web3.eth.getBalance(web3.eth.accounts[0]),'ether').toNumber();

The output is as shown in Figure 12.

Figure 12

To check the balance of Web3.eth.accounts[0] in MetaCoin(not ether), use the following command:

MetaCoin.deployed().then(function(instance){return instance.getBalance.call(web3.eth.accounts[0]);}).then(function(value){return value.toNumber()});

The output is as shown in Figure 13.

Figure 13

The sendCoin Function

To send metacoin from account[0] to account[1], use the following command

MetaCoin.deployed().then(function(instance){return instance.sendCoin(web3.eth.accounts[1], 100);});

To send metacoin from account[m] to account[n], use the following command

MetaCoin.deployed().then(function(instance) { return instance.sendCoin(web3.eth.accounts[n], 10, {from:web3.eth.accounts[m]});})

Example

MetaCoin.deployed().then(function(instance) { return instance.sendCoin(web3.eth.accounts[1], 1000, {from: web3.eth.accounts[0]});})

The output is as shown in Figure 14.

Figure 14

The check whether the transaction is successful , we can check the balance of both accounts. (Note that this is the MetaCoin balance, NOT the Eth balance)

MetaCoin.deployed().then(function(instance){return instance.getBalance.call(web3.eth.accounts[0]);}).then(function(value){return value.toNumber()});

The output is as shown in Figure 15.

Figure 15

To convert MetaCoin to Ether, use the following code

MetaCoin.deployed().then(function(instance){return instance.getBalanceInEth.call(web3.eth.accounts[n]);}).then(function(value){return value.toNumber()});

Example

MetaCoin.deployed().then(function(instance){return instance.getBalanceInEth.call(web3.eth.accounts[0]);}).then(function(value){return value.toNumber()});

The output is as shown in Figure 16.

Figure 16

Debugging the Transaction

In the sendCoin() example,  a transaction has occurred on the blockchain. This transaction can be stepped through line by line, using the Truffle debugger. To do this , the Truffle debug command is used, passing in the transaction hash. This hash can be found in the console output following the sendCoin function call.

The command is

truffle(develop)> debug '0x4ca1828eb19679fbdd23722c62f11f2ddb4d3b3b229ffa7676bfaae924750ba6'

This will start the Truffle debugger. The instructions for interacting with the debugger are printed to the console, as shown in Figure 17.

Figure 17

You should start by adding a watch to the passed variables. do this by entering the following command:

+: receiver 
+: amount 

As you step through the code, the values passed into the function will be shown. Note, these are ‘undefined’ at the start of the function call.

You can press the enter key a few times to step through the code that was executed in this transaction. The output is as shown in Figure 18.

Figure 18


The debug commands can be used to inspect the variables, and add watched variables, as shown in Figure 19.

Figure 19

You can try to enter other commands.

Lastly, type quit to quit debugger

Deploying Your MetaCoin Contract with Truffle

Deploy to Ganache

Ganache is your personal Ethereum blockchain which is convenient for testing and interacting with your contracts during development. It ships with a helpful GUI that allows you to see available test accounts quickly, explore transactions, read logs, and see how much gas was consumed. Configure your truffle.js and truffle.config.js  for the Ganache network:

module.exports = {
  networks: {
    ganache: {
      host: "127.0.0.1",
      port: 7545,
      network_id: "*" // matching any id
    }
  }
};

Launch Ganache

In the Truffle console, enter the following command:

truffle migrate --network ganache

The output is as shown in Figure 20.

Figure 20

Ganache output is as shown in Figure 21.

Figure 21

Click transaction and compare the transaction hash. They are the same.

Figure 22

Deploy to Ropsten

Run a node connected to Ropsten and specify the address of the default (first) account to unlock. You will be prompted for a passphrase.

geth --unlock <account> --testnet --rpc --rpcapi eth,net,web3

Configuration for the Ropsten network:

module.exports = {
  networks: {
    ropsten: {
      host: "127.0.0.1",
      port: 8545,
      network_id: 3,
      gas: 4700000
    },
  }
};

Deploy to the Ropsten network:

truffle migrate --network ropsten

Deploy to Rinkeby

Rinkeby network is available only using geth client.

geth --unlock <account> --rinkeby --rpc --rpcapi eth,net,web3

Configuration for the Rinkeby network:

module.exports = {
 networks: {
   rinkeby: {
     host: "127.0.0.1",
     port: 8545,
     network_id: 4
   },
 }
};

Deploy to the Rinkeby network:

truffle migrate --network rinkeby


Storing Data on Blockchain

Though we are experiencing crypto winter at the moment, with major coins devalued more than 80% in 2018, the underlying blockchain technology is still exciting. The blockchain provides a democratized trust, distributed and validation protocol that has already disrupted banking and financial services and is on the verge of overhauling other industries like healthcare, supply chain, HR and more.

Despite the hype and its promising future, blockchain still has its shortcomings, the issue of data storage is one of them. The transactions based on the POW consensus for bitcoin, Ethereum, and other cryptocurrencies are extremely slow and therefore not suitable for storage of large data. For example, the deployment of dApp Cryptokitties nearly crippled the Ethereum network

The main problem of storing data on a blockchain is the limitation of the amount of data we can store because of its protocol and the high transaction costs. As a matter of fact, a block in blockchain can store data from a few kilobytes to maybe a few megabytes. For example, the block size of the Bitcoin is only 1Mb. The block size limitation has a serious impact on the scalability of most cryptocurrencies and the bitcoin community is debating whether to increase the block size.

Another issue is the high cost of the transactions. Why is storing data on the blockchain so expensive? It is because the data has to be stored by every full node on the blockchain network. When storing data on the blockchain, we do pay the base price for the transaction itself plus an amount per byte we want to store. If smart contracts are involved, we also pay for the execution time of the smart contract. This is why even storing kilobytes of data on the blockchain can cost you a fortune.

Therefore, it is not viable to store large data files like images and videos on the blockchain. Is there a possible solution to solve the storage issue? Yes, there are quite a few solutions but the most promising one is IPFS.

What is IPFS?

IPFS or Interplanetary File System is an innovative open-source project created by the developers at Protocol Labs. It is a peer-to-peer filesharing system that aims to change the way information is distributed across a wide area network. IPFS has innovated some communication protocols and distributed systems and combine them to produce a unique file-sharing system.

The current HTTP client-server protocol is location-based addressing which faces some serious drawbacks. First of all, location-based addressing consumes a huge amount of bandwidth, and thus costs us a lot of money and time. On top of that, HTTP downloads a file from a single server at a time, which can be slow if the file is big. In addition, it faces single-point of failure. If the webserver is down or being hacked, you will encounter 404 Not Found error. Besides that, it also allows for powerful entities like the governments to block access to certain locations.

On the other hand, IPFS is a content-based addressing system. It is a decentralized way of storing files, similar to BitTorrent. In the IPFS network, every node stores a collection of hashed files. The user can refer to the files by their hashes. The process of storing a file on IPFS is by uploading the file to IPFS, store the file in the working directory, generate a hash for the file and his file will be available on the IPFS network. A user who wants to retrieve any of those files simply needs to call the hash of the file he or she wants. IPFS then search all the nodes in the network and deliver the file to the user when it is found.

IPFS will overcome the aforementioned HTTP weaknesses. As files are stored on the decentralized IPFS network, if a node is down, the files are still available on other nodes, therefore there is no single point of failure. Data transfer will be cheaper and faster as you can get the files from the nearest node. On top of that, it is almost impossible for the powerful entities to block access to the files as the network is decentralized.

The following figure shows the difference between the centralized client-server protocol(HTTP) and the peer-to-peer IPFS protocol.


 [Source: https://www.maxcdn.com/one/visual-glossary/interplanetary-file-system/]

Blockchain and IPFS

IPFS is the perfect match for the blockchain. As I have mentioned, the blockchain is inefficient in storing large amounts of data in a block because all the hashes need to be calculated and verified to preserve the integrity of the blockchain. Therefore, instead of storing data on the blockchain, we simply store the hash of the IPFS file. In this way, we only need to store a small amount of data that is required on the blockchain but get to enjoy the file storage and decentralized peer-to-peer properties of IPFS.

One of the real-world use cases of blockchain and IPFS is Nebulis. It is a new project exploring the concept of a distributed DNS that supposedly never fails under an overwhelming access request. Nebulis uses the Ethereum blockchain and the Interplanetary Filesystem (IPFS), a distributed alternative to HTTP, to register and resolve domain names. We shall see more integration of Blockchain and IPFS in the future.

References

Building the blockchain using JavaScript

The blockchain is a data structure that comprises blocks of data that are chained together using a cryptographic hash. In this article, we shall attempt to build a blockchain prototype using JavaScript. This is a bit technical for non-technical people but should be a piece of cake for computer nerds.

First of all, let’s examine the content of a block. A block consists mainly of the block header containing metadata and a list of transactions appended to the block header. The metadata includes the hash of the previous block, the hash of the block, timestamp, nonce, difficulty and block height. For more information, please refer to my earlier article Blockchain in a Nutshell.

Prior to writing the code, you need to install the following software:

  • Chocolatey
  • Visual Studio Code
  • node.js

The installations are based on Windows 10, but you can do the the same thing easily in Ubuntu. Chocolatey is a software management solution for Windows, Visual Studio Code is a streamlined code editor with support for development operations like debugging, task running and version control and Node.js is an open source server environment.

Let’s start writing the code using Visual Studio Code. The first line is

const SHA256 = require("crypto-js/sha256");

This code meas we are using the JavaScript library of crypto standards. We require the crypto-js library because the sha256 hash function is not available in JavaScript.The crypto module provides cryptographic functionality.

SHA-256 is a cryptographic hash algorithm. A cryptographic hash is a kind of ‘signature’ for a text or a data file. SHA-256 generates an unique 256-bit signature for a text.  SHA256 is always 256 bits long, equivalent to 32 bytes, or 64 bytes in an hexadecimal string format. In blockchain hash, we use hexadecimal string format, so it is 64 characters in length.

Next, we create the block using the following scripts:

class Block {
   constructor(index, timestamp, data, previousHash = '') {
       this.index = index;
       this.previousHash = previousHash;
       this.timestamp = timestamp;
       this.data = data;
       this.hash = this.calculateHash();
   }

The class Block comprises a constructor that initializes the properties of the block. Each block is given an index that tells us at what position the block sits on the chain. We also include a timestamp, some data to store in the block, the hash of the block and the hash of the previous block.

We also need to write a function calculateHash() that creates the hash, as follows:

 calculateHash() {
       return SHA256(this.index + this.previousHash + this.timestamp + JSON.stringify(this.data)).toString();
   }
}

Finally, we write the script that creates the blockchain, as follows:

class Blockchain{
   constructor() {
       this.chain = [this.createGenesisBlock()];
   }

   createGenesisBlock() {
       return new Block(0, "01/01/2017", "Genesis block", "0");
   }

   getLatestBlock() {
       return this.chain[this.chain.length - 1];
   }

   addBlock(newBlock) {
       newBlock.previousHash = this.getLatestBlock().hash;
       newBlock.hash = newBlock.calculateHash();
       this.chain.push(newBlock);
   }
   

Notice that the class blockchain comprises a constructor that consists of a few functions, createGenesisBlock(),  getLatestBlock() and  addBlock(newBlock).

Save the file as myblkchain.js or any name you like.

Now, execute the file in the VS terminal using the following command

node myblkchain.js

The output is as follows:

Let’ examine the output. Notice that each block comprises the properties index, previous hash, data and hash.

The index for the Genesis is always 0 . Notice that the hash of the genesis block and the previous hash of the second block are the same. It is the same for other blocks.

References